Baby Proofing on a Budget: Dollar Store Hacks and Affordable Essentials

Every dollar you spend on baby proofing costs less than the first hour of an emergency room visit. That’s not a metaphor. It’s the math that should drive every purchasing decision you make in the next few months.
The instinct to wait, to see what your child gets into before buying a bunch of stuff, is understandable. But the hazards that send children to emergency rooms don’t announce themselves. About 93,000 children under 5 are treated in U.S. emergency rooms each year for stair-related injuries alone (Nationwide Children’s analysis of CPSC NEISS data, 1999–2008). Each year, an estimated 60,000+ children under five are treated in U.S. emergency departments for unintentional poisoning (CPSC). These aren’t rare worst-case scenarios. They’re Tuesday afternoons.
Budget proofing isn’t about cutting corners. It’s about spending strategically, knowing which products can come from the dollar store and which ones need a real investment.
Start With a Room-by-Room Audit, Not a Shopping Cart
Before you buy anything, walk your home at floor level. Literally get on your hands and knees. What you see from 18 inches off the ground is a different environment than what you see standing up.
The CPSC and AAP both offer free safety checklists at their websites, and I’d recommend downloading both. They overlap in useful ways and catch different things. I used the AAP checklist when my older daughter started pulling up on furniture, and it flagged two hazards in our living room I had overlooked: a floor lamp with an accessible cord and a low bookshelf with heavy items on the bottom shelf.
Work room by room. Kitchen and bathrooms first, always. These are the highest-risk spaces in any home with a toddler. Living areas second. Bedrooms third. Don’t let the scope overwhelm you into paralysis. A partial audit completed this week beats a comprehensive one planned for next month.
What the Dollar Store Can Do for You
Dollar stores and discount retailers are useful for certain categories of baby proofing. The key is knowing which categories.
Adhesive corner and edge bumpers are a reasonable dollar-store purchase for most furniture. They’re foam, they compress on impact, and even the cheap versions do the job they’re designed to do. The caveat: adhesive-backed bumpers require a clean, dry, smooth surface to hold. I’ve had them peel off the corners of our coffee table within two weeks during humid summers. On textured walls or painted brick, they often won’t stick at all. Buy a few extra, and keep double-sided mounting tape on hand for reinforcement.
Non-slip bath mats are another solid dollar-store find. The function is simple, the material requirements are low, and a $2 mat does the same job as a $15 one. Just check that the suction cups are intact and replace them when they stop gripping.
Door pinch guards made of foam are cheap and effective, assuming you use them. My younger daughter went through a phase of slamming every door in the house repeatedly, with great satisfaction. A foam wedge over the top of the door costs almost nothing and prevents the kind of finger injury that sends parents to urgent care. The limitation is consistency. They offer no protection if they’re sitting on the counter instead of on the door.
Cord management clips and wraps are widely available for very little money. Use them. According to CPSC GoCordless data, about 9 children under age 5 die each year from window-covering cord strangulation. Per CPSC, nearly half of more than 200 corded-window-covering incidents involving children up to age 8 (2009–2021) resulted in a death. In 2022, the CPSC adopted federal safety rules requiring most new residential window coverings to be cordless or have inaccessible cords (custom standard 16 CFR 1260 effective May 30, 2023). If you have older corded blinds, gather cords at least 7 inches above the floor and well away from any area where a child sleeps or plays. Cord wind-ups and clips cost almost nothing and are available at any hardware store.


Cabinet Locks and Drawer Latches: Spend Here
This is not the category to cheap out on, but you also don’t need to spend a fortune. What you need is a lock that a determined toddler cannot defeat through repeated manipulation.
I learned this the hard way. My younger daughter emptied the cabinet under our kitchen sink in the time it took me to answer the front door. She was 18 months old. What was under that sink: dish soap, drain cleaner, and a sponge she immediately put in her mouth. We had a magnetic cabinet lock on that cabinet. It had been installed correctly. The magnet key had been left on the counter directly above it.
The lock was fine. Our system was not.
America’s Poison Centers reported more than 87,000 cases of children under 6 exposed to household cleaning products in 2024, the single largest substance category for that age group. According to CDC PROTECT / NEISS-CADES, about 36,000 children under five are treated in U.S. emergency departments each year for unsupervised medication exposures, roughly 100 children per day. Cabinet locks are the single highest-return investment in your baby proofing budget because the hazards behind those doors are dangerous.
Magnetic cabinet locks in the $20–$35 range for a pack of 8–10 are the sweet spot. They’re invisible from the outside, they resist toddler manipulation, and they work on most standard cabinet styles. Spring-loaded latches are cheaper and easier to install but easier for a clever 2-year-old to defeat. My older daughter figured out our spring latches at 26 months. I watched her do it. She was methodical about it. We switched to magnetic locks the same week.
Outlet Covers: Skip the Plastic Plugs
Basic plastic outlet covers are better than nothing, but they’re not much better. A determined toddler can remove them. And a parent who removes one to plug in a vacuum and forgets to replace it has created exactly the hazard they were trying to prevent.
Since 2008, the National Electrical Code has required tamper-resistant receptacles in all new residential 125V outlets (NEC §406.12). If your home was built or renovated after 2008, you may already have them. Check by trying to insert a single prong into one slot. If it doesn’t go in, you have tamper-resistant receptacles and you’re covered.
If your home has older outlets, sliding outlet covers are a meaningful upgrade over plastic plugs. They require simultaneous pressure from two points to open, which is beyond most toddlers. They cost $10–$15 for a pack and install in seconds. Prioritize outlets in play areas, bedrooms, and anywhere a child spends time on the floor.
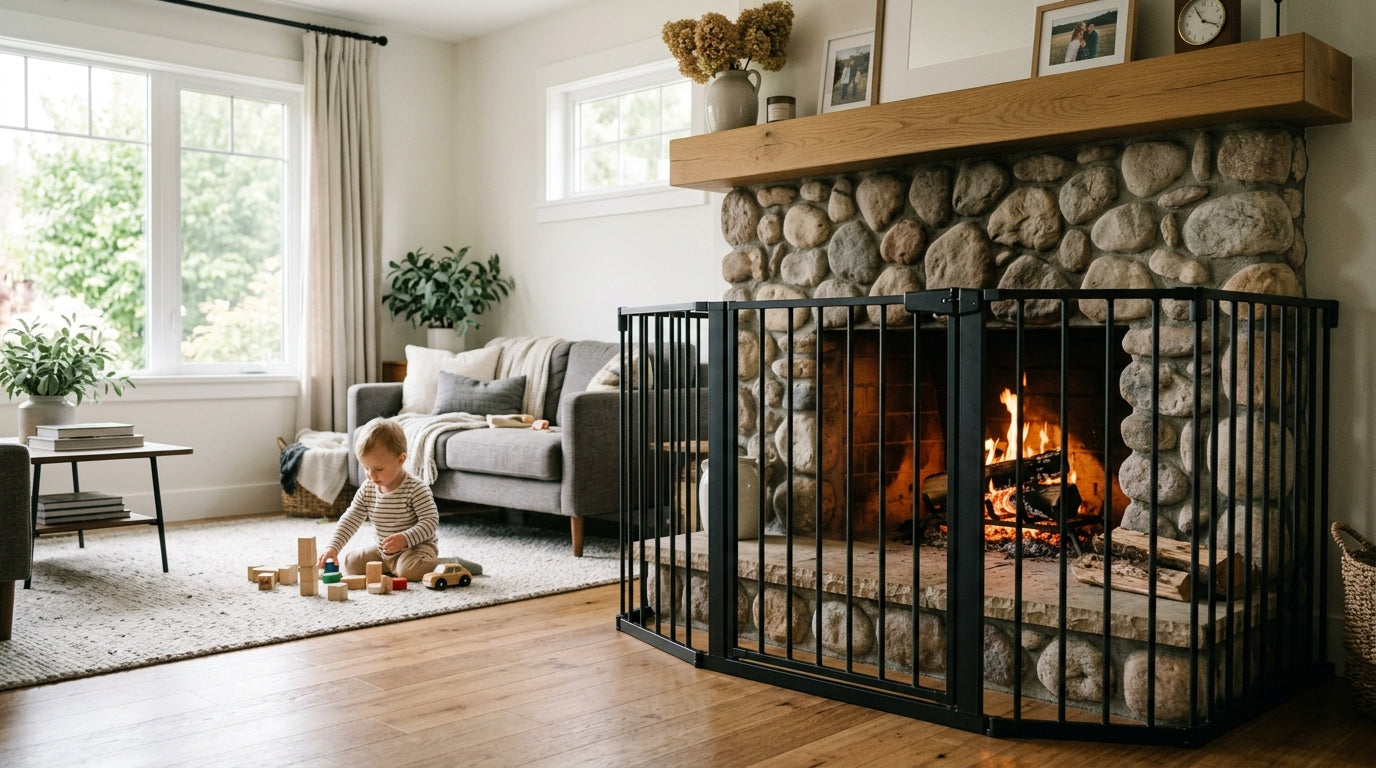
Stair Gates: Measure Twice, Buy Once
Falls down stairs are one of the most common serious injuries in this age group. A gate that fails is worse than no gate at all because it creates false confidence.
Budget stair gates work well on standard doorways and flat-wall openings. Any gate you buy should meet ASTM F1004, the federal safety standard for expansion gates and expandable enclosures (16 CFR Part 1239, effective 2021). Check the packaging.
Where budget models fall short: angled walls, unusual frame widths, and top-of-stair installations. Pressure-mounted gates should never be used at the top of stairs. They can be pushed out by a child’s weight. A hardware-mounted gate, screwed into wall studs or a solid frame, is the only appropriate choice at the top of a staircase. This is a category where spending an extra $20–$30 for a gate with hardware mounting capability is worth it.
Measure your opening before you buy. Most standard doorways fall in the 28–32 inch range, but older homes vary. An expansion gate that’s stretched to its maximum width is less stable than one used within its rated range.
Furniture Anchors: Non-Negotiable, Inexpensive
Dresser and bookcase tip-overs kill children every year in the United States. Furniture anchor straps cost $10–$20 for a two-pack and take about 20 minutes to install. The math is obvious.
Any freestanding piece taller than your child, and any piece a child might use as a ladder, needs to be anchored. This includes dressers, bookshelves, wardrobes, and televisions. Budget anchor straps work as well as expensive ones as long as they’re installed into wall studs. Drywall anchors alone are not sufficient. Find the studs, use the right hardware, and test the installation by pulling on the furniture yourself before trusting it.
Bathroom Safety: Cheap Products, High Stakes
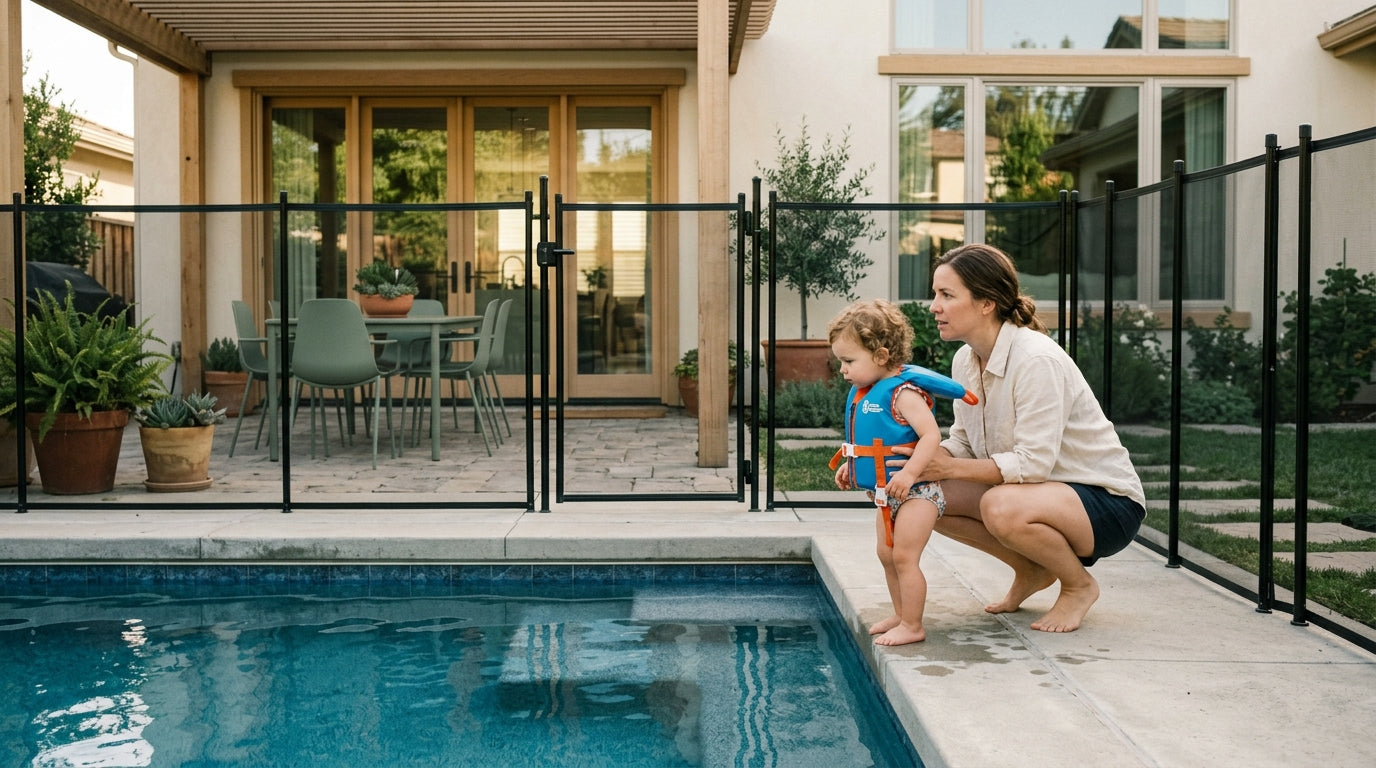
Drowning is the leading cause of unintentional injury death in children ages 1–4 in the United States. The bathroom is where this risk concentrates.
Non-slip mats inside and outside the tub are a low-cost essential. Faucet covers protect against head injuries during bath time and cost under $10. Toilet seat locks are inexpensive and prevent both drowning risk and the enthusiastic toddler habit of dropping objects into the toilet.
The most important bathroom rule costs nothing: drain the tub immediately after use. A child can drown in a few inches of water. No product replaces that habit, but the products reinforce it.
Set your water heater to 120°F (49°C) or below. Scalds happen fast, and a child’s skin burns at lower temperatures and with shorter exposure than an adult’s. This adjustment costs nothing and takes two minutes.
Budget Baby Proofing Checklist
Window Safety on a Budget
In homes above ground level, window stops are essential. Adhesive window stops limit how far a window can open, typically to 4 inches or less, and cost very little. They’re not the most robust solution, but they work if the adhesive holds. Test them monthly, especially after temperature changes that cause window frames to expand and contract.
If you’re in a rental and can’t install hardware, adhesive stops are your best budget option. If you own your home, consider screw-in window stops or window guards for any window above the first floor where a child could access the sill.
NYC Health Code Section 131.15 requires window guards in apartments where children age 10 or younger reside, reflecting how seriously this hazard is taken in high-density housing. Even outside New York, the principle applies.
Building a System, Not Just a Product List
The honest truth about budget baby proofing is that the products are only part of it. A $3 foam door wedge that’s sitting on a shelf does nothing. A magnetic cabinet lock whose key lives on the counter above it does nothing. The system has to work even when you’re tired, distracted, or answering the door.
Install things in a way that makes the safe behavior the easy behavior. Put the magnetic key for cabinet locks in a high drawer, not on the counter. Put door wedges on the doors, not in a bin nearby. Make the default state of every hazardous area the locked, blocked, covered state.
Do a second audit 30 days after your initial proofing pass. Children change fast. What wasn’t a hazard at 10 months, when your child couldn’t pull to stand, is a real hazard at 13 months. The room-by-room checklist isn’t a one-time exercise. It’s a habit you build into the first few years.
Free resources from both the AAP at HealthyChildren.org and the CPSC at cpsc.gov include printable checklists, installation guides, and product recall databases. Use them. The information is there, it’s current, and it costs nothing.
Budget proofing done comprehensively is effective proofing. The goal isn’t to spend the least amount of money possible. The goal is to remove the hazards that matter most, in the right order, with products that will hold up to a curious toddler who has more time and determination than you do.