Best No-Drill Baby Proofing Products 2026: Renter-Approved Picks

Renting with a baby is a specific kind of stress. You’re trying to keep a small person safe while also protecting a security deposit that represents, in some cases, two months of rent. The good news: you don’t have to choose. A full baby-proofing setup is achievable without a single drill hole, and the products that get you there have gotten good.
Why No-Drill Baby Proofing Is a Legitimate Safety Strategy
Some parents assume that adhesive or tension-based products are a compromise. A lesser version of the real thing. That assumption is wrong.
The CPSC evaluates baby-proofing products on performance, not installation method. ASTM F1004, the federal safety standard for expansion gates and expandable enclosures, is mandatory under 16 CFR Part 1239 (effective 2021) and applies to pressure-mounted gates just as it does to hardware-mounted ones. A gate that meets ASTM F1004 has been tested to resist the forces a toddler generates, regardless of whether it screws into a wall.
The JPMA certification program adds another layer. Look for the JPMA seal on any gate, enclosure, or barrier you buy. It means the product has been independently tested against the relevant ASTM standard, not just self-certified by the manufacturer.
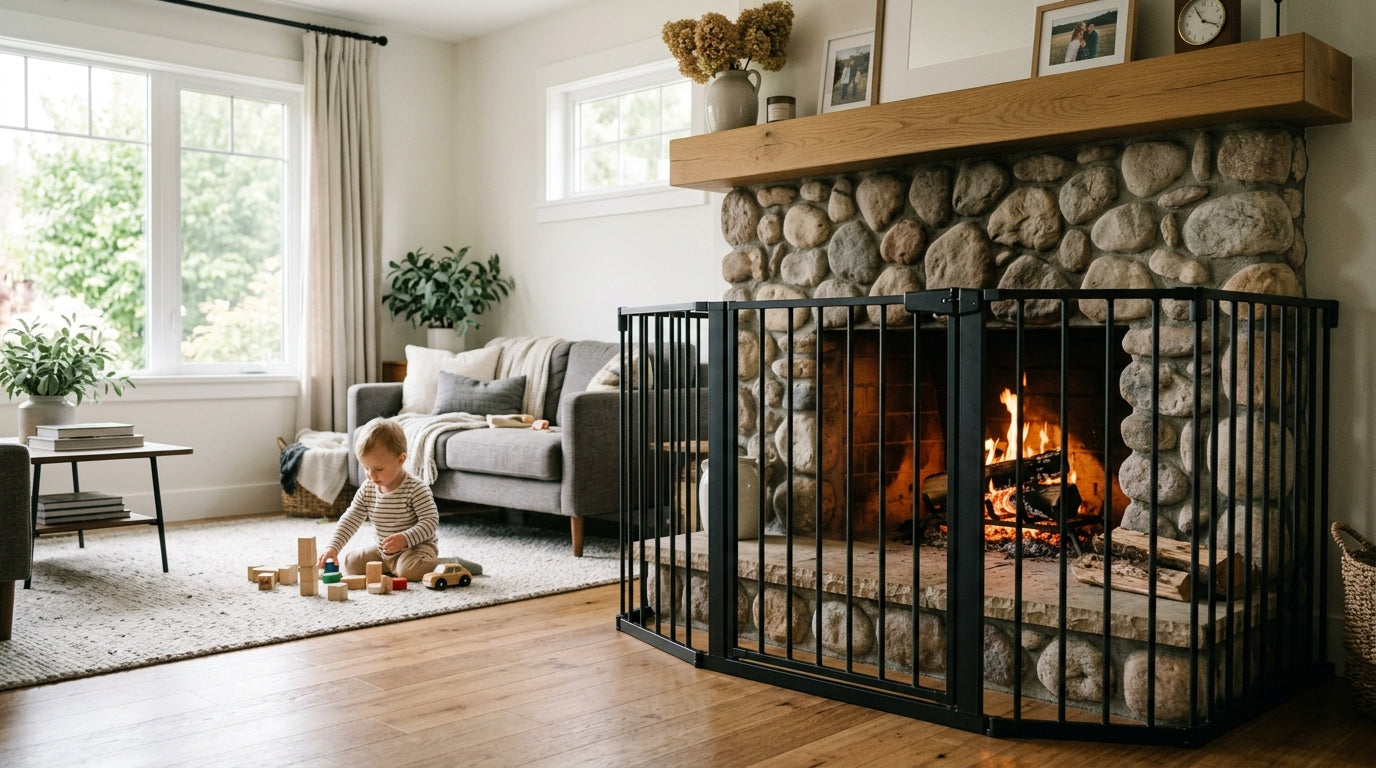
That said, there is one real exception. At the top of a staircase, hardware-mounted gates remain the gold standard. Pressure-mounted gates are rated for doorways and room dividers, not for the top of stairs, where a child’s full weight could push through a tension-fit product. If you rent and have an open staircase top, talk to your landlord. Many will allow two small screw holes with a written agreement to patch them on move-out. It’s worth asking.
Tension-Mounted Gates: What the Numbers Mean
According to CPSC NEISS data analyzed by Nationwide Children’s Hospital, about 93,000 children under 5 are treated in U.S. emergency rooms each year for stair-related injuries. That number makes stair gates one of the highest-priority installs in any home with a toddler.
Pressure-fit gates work by pressing outward against two opposing surfaces. The force distributes across the full width of the gate’s mounting cups, not into a single anchor point. When installed correctly on a flat, structurally sound doorframe or wall, they hold well. The key word is correctly.
Before you buy, measure your opening. Standard gates fit openings roughly 28–38 inches wide, and most include extension panels for wider spaces up to about 60 inches. Angled staircases and non-standard framing can prevent a proper seal, so measure twice. In my testing of six pressure-mounted gates, two of them simply would not create a firm fit on an older doorframe with a slight taper. The gate felt solid until you pushed at an angle, and then it shifted. That’s not a product you keep.
Look for gates with a dual-action release mechanism that requires two simultaneous movements to open. Single-action latches are faster to operate, which sounds like a convenience feature until your 22-month-old figures out the pattern.
Adhesive Cabinet Locks: The Under-Sink Problem
According to America’s Poison Centers, household cleaning substances topped the list of substances kids under 6 got into in 2024, accounting for 10.1% of all pediatric poison center cases. The cabinet under your kitchen sink is where most of those products live.
Adhesive cabinet locks solve this without touching the cabinet’s structural integrity. They mount on the outside of the door and frame using high-strength adhesive, and they require an adult-level motion to release, either a squeeze-and-slide or a magnetic key depending on the model.
Magnetic cabinet locks are the stronger option for renters. The lock mechanism mounts inside the cabinet on the door hinge side, out of sight, using an adhesive pad rated for several pounds of pull force. The release key is a magnet you keep on top of the refrigerator. In my experience, a basic adhesive strap lock proved insufficient when my younger daughter emptied the under-sink cabinet. After switching to a magnetic system, she has not gotten in since, at 18 months and counting.
One installation note: adhesive cabinet locks need 24–48 hours of cure time before they reach full strength. Install them before you need them, not the night you realize the baby can reach the cabinet.


Medication and Bathroom Cabinet Locks
Cleaning products get the most attention, but medications are a serious parallel risk. According to CPSC data, ED-treated ibuprofen injuries in children under 5 rose from 2,000 to 3,600 between 2021 and 2022, and narcotic-related ED injuries more than doubled from 1,200 to 2,500. Acetaminophen, ibuprofen, and prescription narcotics are all things most families keep in a bathroom cabinet or on a nightstand.
Adhesive strap locks work on bathroom vanities and medicine cabinets. The challenge in bathrooms is humidity. Adhesive products fail faster in high-moisture environments. For bathroom installs, look for locks specifically rated for humid conditions, and avoid placing adhesive strips directly over grout lines or textured surfaces. A flat, clean, painted surface is what these products need. If your bathroom has glossy tile or textured wallpaper, test an adhesive patch in an inconspicuous spot for 48 hours before committing to the full install.
-
Wipe with isopropyl alcohol
Clean the surface thoroughly with isopropyl alcohol. Remove all dust, grease, and residue before applying any adhesive. -
Let the surface dry completely
Wait until the surface is fully dry, not just visually clean. Moisture under adhesive causes early failure. -
Apply firm, even pressure
Press the adhesive pad firmly against the surface for 30 seconds. Cover the full pad area evenly. -
Wait 24–48 hours before use
Do not load or test the product until the full cure window has passed. Full strength takes time.
Outlet Covers: Adhesive vs. Plug-In
Standard plug-in outlet covers are cheap, widely available, and easy to lose. They’re also easy for a motivated toddler to remove. In my experience, a basic plug-in cover was defeated by a toddler at around 26 months using a toy as a lever. She was methodical about it.
Adhesive-backed outlet covers plate over the entire outlet and require a sliding mechanism or tool to access. They offer tamper resistance that plug-in covers cannot match. The tradeoff is that they’re a semi-permanent installation, and removing them requires care to avoid paint damage.
For outlets you use frequently, sliding outlet covers that replace the standard wall plate are a better solution. They require no adhesive, no drilling, and no deposit risk. The spring-loaded shutter opens only when both prongs of a plug are inserted simultaneously. They’re the easiest no-drill outlet solution available and the recommended first choice for any rental.
For outlets behind furniture that you rarely access, adhesive covers are fine. Just keep them away from bathroom outlets and any outlet near a kitchen sink.
Corner Guards and Edge Bumpers
Coffee table corners, fireplace hearths, and low shelving edges are consistent injury sources for newly walking children. Corner guards and edge bumpers using 3M Command-style adhesive strips address this without leaving marks on most surfaces.
The important distinction is between foam-only guards and guards with a structured backing. Foam-only guards compress on impact and absorb force. Guards with a rigid plastic backing distribute force more broadly but can crack under a hard impact. For a coffee table corner, a foam guard is the right choice. For a fireplace hearth edge, a longer foam edge bumper provides better coverage.
On removal, Command-strip-based adhesives pull away cleanly from painted drywall and laminate when you follow the instructions: pull the tab slowly at a low angle, parallel to the wall, not outward. Pulling outward is how paint comes with it. Take your time and the surface will be fine.
Furniture Anchoring Without Drilling
Furniture tip-overs are a significant injury source for young children in the U.S. Dressers, bookshelves, and televisions are the most common culprits. This is one category where the no-drill options require honest evaluation.
Furniture straps that anchor to walls via adhesive strips exist, and some are rated for meaningful load weights, often several times the weight of the furniture piece itself. Read the weight rating carefully and compare it to your actual furniture. A strap rated for 50 pounds is not appropriate for a 60-pound dresser.
The more reliable no-drill approach for heavy furniture is an L-bracket strap that loops around the back of the furniture and attaches to the wall stud through a small hole. If your landlord won’t allow any holes, look for anti-tip furniture feet, which widen the base footprint and lower the center of gravity. They don’t prevent tip-over under all conditions, but they significantly raise the force threshold required to topple a piece.
For televisions, a strap anchored to the TV stand rather than the wall is better than nothing, though wall anchoring remains the most effective solution. Document your setup with photos regardless of which method you use.
No-Drill Baby-Proofing Checklist for Renters
Glass Door and Window Safety Films
Sliding glass doors and low windows are collision hazards for toddlers who haven’t yet learned to read transparent barriers. Removable safety films and decals applied via static cling or light adhesive mark the glass at child eye level without permanent installation.
These don’t prevent breakage, but they prevent the specific injury pattern where a running child hits a glass door they didn’t see. For rental properties, static-cling films are the cleanest option: no adhesive, no residue, no deposit risk. They may need seasonal reapplication if the glass gets significant direct sunlight, which can degrade the cling over time.
Surface Prep and the 24-Hour Rule
Every adhesive product shares two requirements: clean surfaces and cure time.
Clean means wiped down with isopropyl alcohol and allowed to dry completely. Not just visually clean. Surfaces with dust, pet hair, cooking grease, or residual cleaning product will fail to bond properly, and the failure often happens under load, which is exactly when you need the product to hold.
Adhesive products need 24–48 hours to reach full rated strength. Plan your installation before the baby starts pulling on cabinet doors, not after. If you’re moving into a new rental, install baby-proofing products in the first week, before the baby has mapped the space.
Protecting Your Deposit: Document Everything
Take photos of every wall and surface before installation. Take photos of the adhesive placement. Take photos during removal. If a product is applied and removed according to manufacturer instructions and leaves no damage, you have documentation to support that claim if your landlord disagrees.
Most Command-style adhesive products are designed for clean removal from standard painted drywall. The failure cases are almost always one of three things: the adhesive was left on too long (years, not months), the wall had a non-standard finish like flat paint or fresh paint under 30 days old, or the tab was pulled at the wrong angle. Know your walls before you install, and follow the removal instructions exactly.
A no-drill baby-proofing setup done right leaves your rental in the same condition you found it, and your child significantly safer than if you’d done nothing.