Top Rated Baby Proofing Products: Parent Reviews and Expert Picks

Every parent I know has stood in the baby-proofing aisle at some point, holding two nearly identical cabinet locks and wondering which one their kid will defeat first. My older daughter defeated an adhesive strap lock at 26 months. She didn’t pry it. She just pushed the cabinet door sideways until the adhesive peeled away from the finish. That one moment taught me more about product selection than any packaging claim ever could.
The market for baby-proofing products is enormous, and the quality range is just as wide. Some products are excellent. Some are theater. Knowing which is which requires understanding what each category is protecting against, what certifications mean, and what real-world use looks like after six months of daily opening and closing.
Here’s what I’ve found works, what doesn’t, and how to build a layered approach that grows with your child.
The Safety Categories That Matter
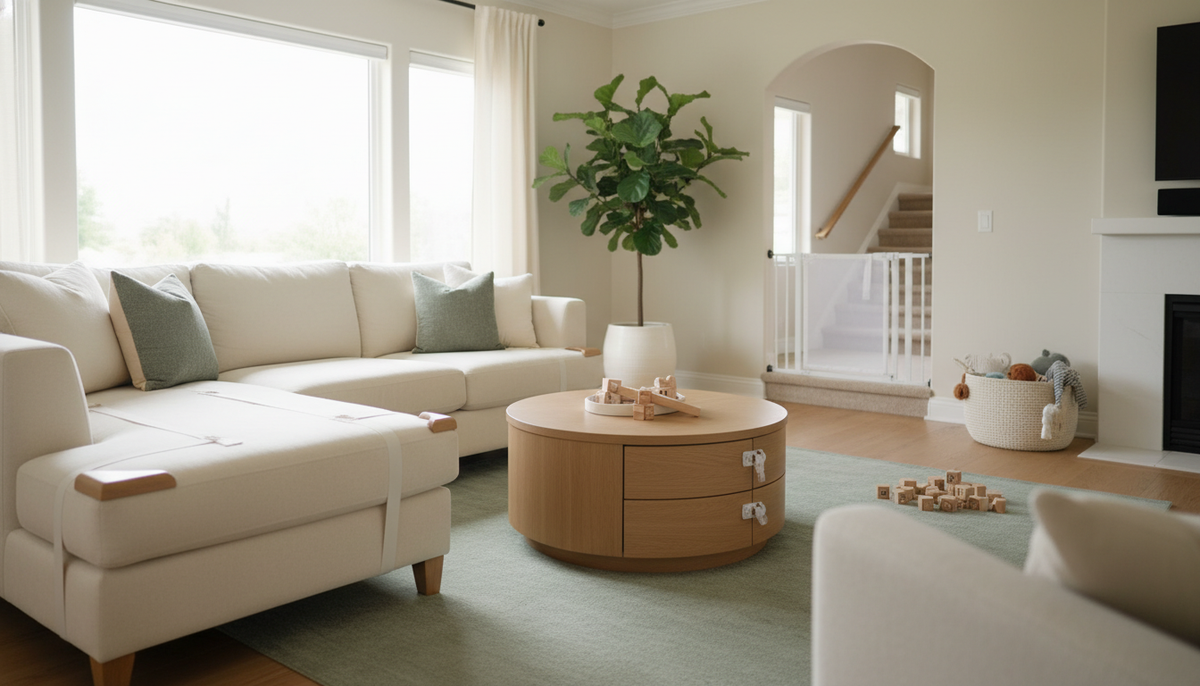
Baby-proofing products fall into five core categories, and each addresses a distinct type of hazard. Gates block access to fall zones. Locks and latches prevent poisoning and injury from sharp objects. Outlet covers reduce electrocution risk. Furniture anchors prevent tip-over injuries. Corner and edge guards reduce head injury during falls. You need all five. They’re not interchangeable, and skipping one category because you’ve covered another is how gaps happen.
The hazards behind these categories are real and well-documented. About 93,000 children under 5 are treated in U.S. emergency rooms each year for stair-related injuries, based on a Nationwide Children’s Hospital analysis of CPSC NEISS data. About 3,300 children age 5 and younger are treated in U.S. emergency rooms each year for window fall injuries (CPSC). In 2024, household cleaning substances topped the list of substances kids under 6 got into, accounting for roughly 1 in 10 of all pediatric poison center cases (America’s Poison Centers). These aren’t edge cases. They’re the everyday hazards that good products are designed to interrupt.
What Safety Certifications Tell You
Before you buy anything, check for third-party certification. Manufacturer claims on packaging mean nothing without independent verification. What you’re looking for is JPMA certification, which indicates a product has been tested against the relevant ASTM standard by an accredited third-party lab.
For gates specifically, ASTM F1004 is the federal safety standard for expansion gates and expandable enclosures, made mandatory under 16 CFR Part 1239 (effective 2021). If a gate you’re considering doesn’t reference this standard, that’s a problem. The CPSC maintains a product safety database where you can check recall history before purchasing, and I’d recommend doing that for any product in a high-stakes category.
Third-party testing badges mean someone outside the company tried to break the product. That matters when your 18-month-old is going to try to break it every single day.


Gates: Pressure-Mounted vs. Hardware-Mounted
This is the most important distinction in the gate category, and it’s one that parents sometimes get backwards. Pressure-mounted gates use tension against door frames or walls to stay in place. Hardware-mounted gates use screws drilled into studs or solid framing. The difference matters enormously depending on where you’re installing.
For top-of-stairs applications, hardware-mounted is required. A pressure gate at the top of stairs can be dislodged by a child’s weight or repeated pushing, resulting in a fall down a full flight of stairs. Hardware-mounted gates, properly installed into studs, are designed to withstand that force. The installation is more involved and leaves small holes in your trim, but that’s the trade-off.
Pressure-mounted gates work well for doorways, hallways, and bottom-of-stairs applications where a dislodged gate means the child walks into a room rather than falls down stairs. They’re easier to move between locations and leave no permanent marks, which matters if you’re renting.
When I was testing gates for our renovation last year, I installed four different models across two doorways and the top of our main staircase. The pressure gates I tested all had some degree of wobble at the base after a few weeks of my younger daughter pushing on them during the "I want to be in the kitchen" phase. The hardware-mounted gate at the top of the stairs showed no movement at all.
For top-rated options, look for gates with a one-hand adult operation mechanism, a walk-through design so you’re not stepping over it a hundred times a day, and a clear indicator (usually a color change or a click) that confirms the latch is fully engaged.
Baby-Proofing by Developmental Stage
Pre-crawl
Install outlet covers and furniture anchors before baby arrives on the floor.
Crawling
Add stair gates and lock cabinets containing cleaning products or medications.
Pulling up and walking
Add corner guards on low furniture and reinforce all cabinet locks.
Climbing
Reassess every gate latch, lock, and anchor. Upgrade any mechanism showing wear.
Cabinet Locks and Drawer Latches: Three Types, Real Trade-offs
The under-sink cabinet is the most dangerous cabinet in most homes. In 2024, household cleaning substances accounted for roughly 1 in 10 of all pediatric poison center cases (America’s Poison Centers). My younger daughter emptied ours in the time it took me to answer the doorbell. She was 14 months old. After that, I tested every lock type I could find.
Adhesive magnetic locks mount inside the cabinet and require a magnetic key to release. They’re invisible from the outside, which is aesthetically clean, and they’re child-resistant because there’s no visible mechanism to manipulate. The trade-off is installation: the adhesive must bond to a clean, smooth surface, and on painted or textured cabinet interiors, failure rates climb. Screw-mount versions of magnetic locks solve this but require drilling.
Sliding latches mount inside the cabinet and require you to press and slide simultaneously to open. They’re inexpensive and easy to install, but a determined toddler can figure out the motion within a few weeks. My older daughter had the sliding latch on our lower pot cabinet open by 28 months. They’re fine for low-risk cabinets, less appropriate for cleaning supplies or medications.
Key-operated locks and multi-step latches offer the highest child-resistance but the most friction for adults. In a kitchen where you’re opening cabinets constantly while cooking, a lock that requires a separate key becomes a hazard in itself because parents start leaving it unlatched.
My recommendation: magnetic locks on under-sink and cleaning supply cabinets, sliding latches on everything else. The friction cost of magnetic locks is worth it where the contents are dangerous.
Furniture Anchors: The Most Underused Product Category
Furniture tip-overs kill children every year in the United States. The CPSC recommends anchoring all tall, unstable furniture to wall studs regardless of the furniture’s weight rating. A heavy dresser doesn’t become safe because it’s heavy. A climbing toddler pulling on an open drawer creates leverage that can bring down furniture that seems stable when you push on it from the front.
The products themselves are simple: L-brackets or furniture straps that connect the top of a piece of furniture to a wall stud. Most cost under $20. Installation takes 20 minutes. The failure mode when they’re not used is catastrophic.
The two most common installation errors I see are anchoring to drywall instead of studs, and using the furniture’s own backing material as the anchor point. Drywall anchors are not sufficient for tip-over prevention. You need to hit a stud. Use a stud finder. If your furniture has a thin cardboard or MDF backing, anchor the strap through the back and into the solid frame of the piece, or use a bracket that mounts to a solid structural element.
Every dresser, bookshelf, and TV stand in a room where a child spends time should be anchored. The CPSC is clear on this.
Outlet Covers: Why Sliding Plates Beat Plug Inserts
Simple plastic plug inserts, the kind that look like little outlet-shaped caps, were the standard recommendation for years. The problem is that they’re a choking hazard if a child removes them. A curious toddler who watches you pull one out to plug in a lamp will try to replicate that action.
Sliding outlet plate covers replace the entire outlet cover plate with one that has a spring-loaded sliding mechanism. To access the outlet, you have to push and slide simultaneously, which requires more dexterity and coordination than a toddler has. They’re also not removable by a child, so there’s no secondary choking hazard.
The best option, if you’re doing any renovation or your outlets are aging out anyway, is tamper-resistant outlets. These are built into the outlet itself, with internal shutters that only open when equal pressure is applied to both slots simultaneously. They’re required by the National Electrical Code in new construction and are the most reliable solution because there’s nothing to install incorrectly and nothing to remove.
For existing outlets, sliding plate covers are the practical choice. They install in under two minutes with a screwdriver and are meaningfully more tamper-resistant than plug inserts.
Corner and Edge Guards: Material Matters More Than You Think
Corner guards are one of those products where parents often buy the cheapest option and then wonder why it doesn’t stay on. In my experience, I’ve tested foam guards, silicone guards, and harder plastic edge strips across three different coffee tables and a brick fireplace hearth.
Foam guards absorb impact well for low-speed falls, the kind where a toddler loses balance and bumps their head. They’re appropriate for coffee table corners and low furniture edges. Foam compresses and degrades over time, and the adhesive on most foam guards fails within a few months on wood surfaces, especially if the furniture is cleaned regularly.
For fireplace hearths and sharp stone or tile edges, harder silicone or rubber guards with mechanical fastening (not just adhesive) provide better protection. The material needs to be firm enough to distribute impact force across a larger area rather than compressing fully on contact.
The honest limitation of corner guards is that they work best on predictable fall zones. You can’t pad every surface. The more important investment is reducing fall risk through gates and supervision, and using corner guards as a secondary layer on the specific surfaces where head contact is most likely.
Window Safety: A Specific and Serious Hazard
About 3,300 children age 5 and younger are treated in U.S. emergency rooms each year for window fall injuries (CPSC), and windows in homes with young children should not open more than 4 inches (CPSC and AAP). Those two facts together define what window safety products need to accomplish.
Window stops and window guards limit how far a window can open. Window stops are the simpler option: they mount to the frame and create a physical stop that prevents the window from opening past a set point. Window guards are bars or grilles that span the opening. Both work, but window guards require a quick-release mechanism for fire egress, and that mechanism needs to be operable by an adult but not a child.
Window locks that prevent the window from being opened by a child are the minimum baseline. Most windows in older homes have latches that a toddler can manipulate with enough persistence. Secondary locks that require adult hand strength to operate are inexpensive and take minutes to install.
Per AAP guidance, all accessible windows should have functioning locks. Accessible means any window a child can reach, which in a home with climbing toddlers means almost any window on any floor.
Building a Strategy That Grows With Your Child
The products that work for a crawling six-month-old are not the same ones you’ll need at 18 months, and the 18-month setup won’t hold at 30 months. Baby-proofing is iterative, not a one-time installation.
At the crawling stage, the priorities are outlet covers, furniture anchors, and gates blocking stair access. At the pulling-up and early walking stage, add corner guards and reinforce cabinet locks on dangerous cabinets. At the climbing stage (typically 18–24 months), reassess every gate latch, every lock mechanism, and every furniture anchor, because a child who can climb a dresser is testing your installation in ways a crawling child wasn’t.
Read parent reviews specifically for long-term durability. A gate latch that works perfectly for the first three months but develops play in the mechanism by month six is a safety problem. Look for reviews from parents who’ve used the product for a year or more, and weight those over first-impression reviews.
Installation difficulty is a real factor. A product that requires precise measurements, wall anchors, and a drill is more likely to be installed incorrectly than one that mounts with a screwdriver. Be honest about your comfort level and skill set. An easier product installed correctly is safer than a better product installed wrong. When in doubt, hire someone for the hardware-mounted gate and furniture anchors. Those two categories have the highest consequence for installation failure.
The goal is a home where your child can explore and develop independence within a framework that removes the hazards they can’t yet understand. That framework needs maintenance, reassessment, and occasional upgrades as your child gets faster, stronger, and more creative about testing it.