Bottom of Stairs Baby Gate: Pressure Mount and Freestanding Options

About 93,000 children under 5 are treated in U.S. emergency rooms each year for stair-related injuries, according to a Nationwide Children’s Hospital analysis of CPSC NEISS data. That’s roughly one child every six minutes. If you have a mobile baby or a toddler who has discovered the stairs, that number will land differently than it did before you had kids.
A gate helps. But not every gate belongs at the bottom of your stairs, and the wrong one can create a false sense of security that’s more dangerous than no gate at all.
Why the Bottom of Stairs Is a Different Problem
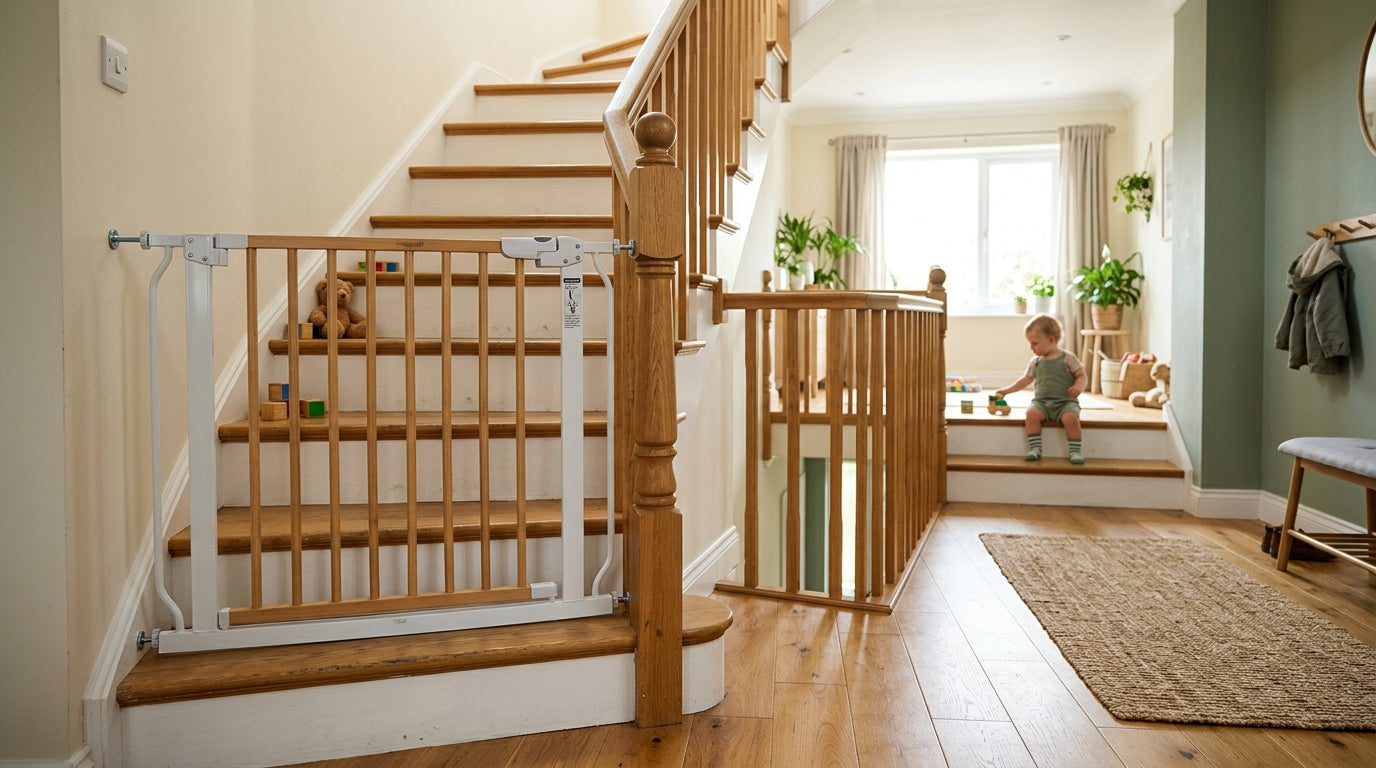
Most parents think about the top of the stairs first, and that instinct makes sense. A fall from the top is a long way down. But the bottom of the stairs has its own risk profile. A child who gets through a bottom gate and starts climbing has already entered the danger zone. And a gate that fails at the bottom, whether it pops out of the wall, swings the wrong direction, or tips over when a toddler grabs it, can send a child backward onto a hard floor.
The bottom of the stairs also tends to be a high-traffic chokepoint. You’re carrying laundry. You’re holding a baby. You’re opening the gate one-handed while your toddler is underfoot. The gate you choose here needs to work well under real conditions, not just in a product video.
What ASTM Certification Means
Before you buy anything, check for ASTM F1930 certification on the label. This is the safety standard for baby gates, and it covers spacing requirements, latch mechanisms, and structural integrity. A gate that meets this standard has been tested to resist the kind of pushing and climbing a determined toddler will throw at it.
One thing to know: ASTM F1004 is the federal safety standard for expansion gates and expandable enclosures, made mandatory under 16 CFR Part 1239 (effective 2021). Accordion-style and expandable gates fall under this standard, and it’s the reason those diamond-shaped openings are a problem. The gaps between the slats in a traditional accordion gate can trap a child’s head or limbs. Keep those designs away from stairs entirely. They’re acceptable for blocking off a doorway to a room, but they have no place at the bottom of a staircase.
For vertical slat spacing on any gate, the 2 3/8 inch threshold prevents head entrapment. This comes from the CPSC standard under 16 CFR 1219, originally established for cribs and widely applied to gates. Measure the slat spacing on any gate you’re considering if the packaging doesn’t list it explicitly.


Pressure Mount vs. Hardware Mount: The Real Difference
Pressure-mount gates use tension bars to wedge between two surfaces. No screws, no wall anchors, no damage to your doorframe or staircase trim. For renters, or parents who want a damage-free installation, that’s appealing.
The problem is physics. A pressure-mount gate holds because of friction. A toddler who leans on it, climbs it, or pushes hard enough can shift that tension. The gate doesn’t fail significantly. It just moves a little. Then a little more. Then one morning it’s not flush against the wall anymore, and there’s a gap.
In my experience, the difference in feel is immediate. A hardware-mounted gate doesn’t flex when you push it. A pressure-mount gate, even a well-installed one, has some give.
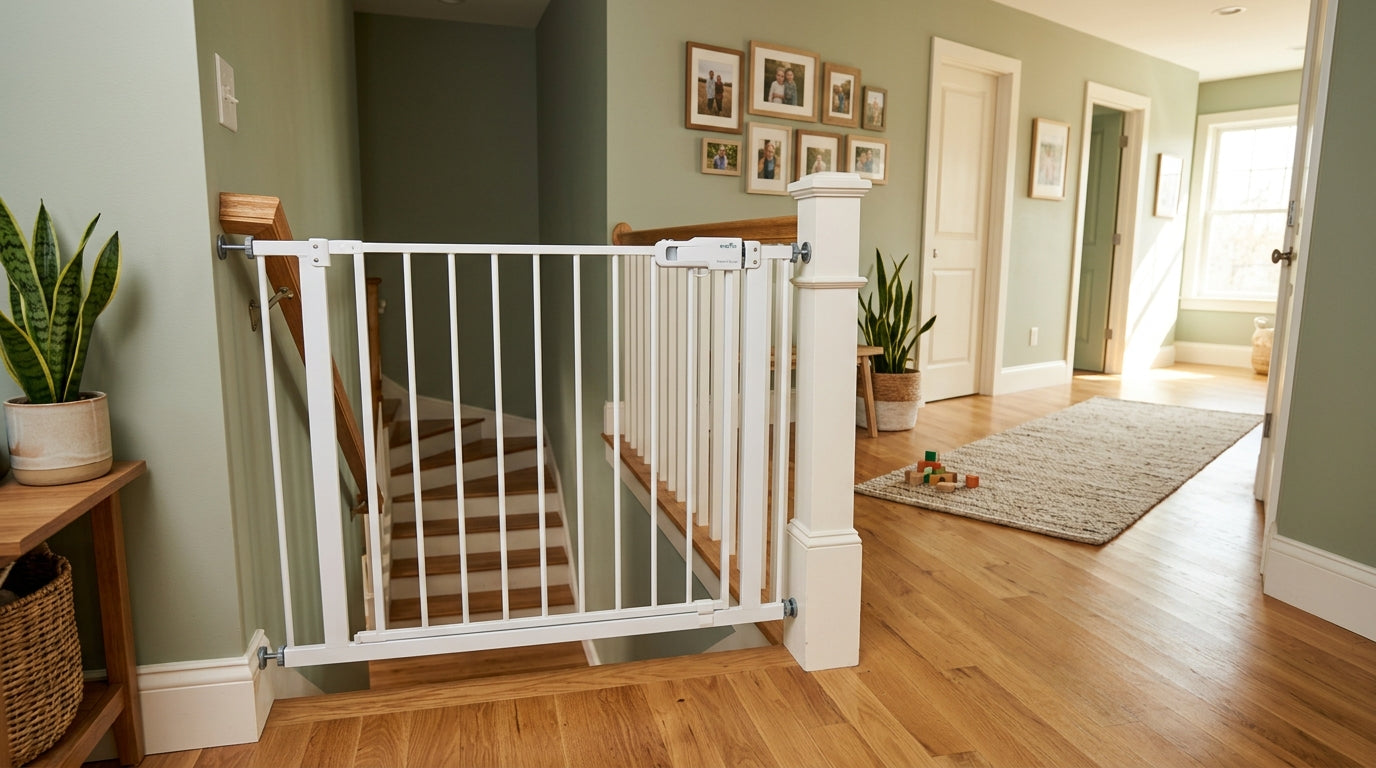
The AAP recommends hardware-mounted gates for stair protection, and that recommendation exists for a reason. If your staircase has a newel post on one side and a wall on the other, hardware mounting is almost always possible. The installation takes twenty minutes and a few wall anchors. The tradeoff for a rental-friendly setup is real, but at the bottom of stairs, hardware mounting is the safer call.
Measuring Your Opening Before You Buy
Gate width is where most parents make their first mistake. They eyeball the opening, buy a gate that looks roughly right, and then discover it either doesn’t fit or fits with so much extension that it’s structurally compromised.
Measure the exact distance between your newel post and the wall, or between two newel posts if you have a wider opening. Write it down. Then look for a gate that fits that measurement snugly with minimal adjustment. Gates that use extension panels to reach their maximum width lose rigidity. A gate at full extension is not as strong as the same gate at its minimum width.
Gaps wider than 2 inches on either side of a gate can allow a child’s head to pass through. Fit matters as much as the gate itself.
Gate Height and Climbing
The minimum height for a baby gate is 30 inches above the stair tread. For most toddlers in the 12–24 month range, that’s sufficient. But toddlers grow, and some of them are climbers before they’re walkers.
If your child is already pulling up on furniture and using it as a ladder, go to 36 inches or taller. The extra height costs you almost nothing in price and buys you months of additional security.
Panel design matters here too. Mesh panels and solid panels give a child nothing to grip. Horizontal slats or bars create footholds. If your gate has horizontal elements, your climber will use them. Stick with vertical slats or solid/mesh panels at the bottom of stairs.
One-Handed Operation and Latch Design
You will open this gate while holding a baby, a laundry basket, a cup of coffee, or all three. One-handed operation is not a convenience feature. It’s a functional requirement.
But there’s a tension here. A gate that’s easy for an adult to open with one hand needs to be difficult for a toddler to open at all. The best designs solve this with a two-step latch: you lift and push, or squeeze and pull. The motion is natural for an adult but requires coordination a toddler doesn’t have yet.
Self-closing hinges are worth the upgrade. When you walk through and your hands are full, you’re not going to reach back and close the gate behind you every single time. A self-closing gate does it for you. Test the closing force before you buy if you can. It should close firmly but not so hard that it slams.
Swing Direction: A Detail That Matters
The gate at the bottom of your stairs should swing away from the stairs, not toward them. If the gate swings toward the stairs and closes suddenly while a child is near it, the child can be pushed backward into the staircase.
This sounds like a small thing. It isn’t. Test the swing direction during installation, before you finish tightening the hardware. Some gates are reversible. Some aren’t. Know which one you have before you commit to a mounting position.
Freestanding Gates: Where They Work and Where They Don’t
Freestanding gates have a legitimate use case. If you’re in a rental with walls that can’t be drilled, or you need a temporary barrier in an open floor plan, a freestanding gate with a wide, weighted base can work. They’re also useful for blocking off a section of a room while you’re present and supervising.
What they cannot do is serve as your primary stair barrier if your child is mobile and strong enough to push or climb. A freestanding gate relies on its own weight and base width to stay upright. A determined toddler can tip one.
If a freestanding gate is your only option at the bottom of the stairs, use it in combination with other supervision strategies, and replace it with a hardware-mounted gate as soon as your living situation allows.
Gate Inspection Checklist
Inspecting Your Gate Over Time
Installation is not a one-time event. Pressure-mount gates need a monthly check. Push on the gate firmly with your palm. If it shifts at all, re-tension it. High-traffic areas and homes with older children who lean on the gate will see faster loosening.
Hardware-mounted gates need an annual check at minimum. Pull on the mounting brackets. Check for any movement in the wall anchors. Look at the gate frame itself for cracks or bends, especially if the gate has taken any hard impacts.
Gates don’t last forever. If a gate is more than five years old, check whether the model has been recalled (the CPSC maintains a searchable recall database), and consider whether it still meets current standards.
The Case for Two Gates
A gate at the top and a gate at the bottom is the most complete stair safety setup. If you’re working with a limited budget and need to choose one first, start at the bottom. Falls down stairs cause more severe injuries than falls up. A child who climbs a few steps and tumbles back down is in a different situation than one who falls from the top landing.
The bottom gate also does double duty: it prevents access to the stairs entirely, which means you don’t have to worry about what’s happening at the top until you’re ready to address it. Install the bottom gate first, install it correctly, and add the top gate when you can.
A well-fitted, hardware-mounted gate that meets ASTM F1930, swings away from the stairs, closes automatically, and has vertical slats no wider than 2 3/8 inches apart is the product you’re looking for. Everything else is a compromise, and at the bottom of the stairs, the cost of a compromise is too high.