Furniture Tip-Over Prevention: A Complete Guide to Anchoring Everything

Every two weeks, a child in the United States dies because a piece of furniture fell on them. That’s not a metaphor for a broader risk category. CPSC reports one child death every two weeks from furniture, TV, or appliance tip-overs, and the data behind that number is specific enough to be uncomfortable: the dresser in your child’s bedroom, the bookcase in the living room, the television on a stand instead of a wall mount.
Anchoring furniture is not a bonus step you get to once the outlet covers are in. It belongs in the same category as stair gates and cabinet locks. The injury numbers are real, the mechanism is predictable, and the fix is not complicated.
Why the Risk Is Higher Than Most Parents Expect
The instinct most parents have is to worry about the biggest, most obviously unstable pieces. The tall wardrobe. The antique bookcase. But CPSC data from the 2023 Annual Tip-Over Report shows that chests, bureaus, and dressers caused 36% of all U.S. tip-over deaths across their reporting period, and 81% of those deaths were children. TVs are involved in 47% of tip-over fatalities overall, with dressers second at 36%.
Nearly 80% of tip-over fatalities involve children age 5 and younger, according to CPSC’s Anchor It! campaign data. These are not teenagers roughhousing. These are toddlers doing what toddlers do: pulling up on anything within reach, treating open drawers as a ladder, climbing toward something they want on a higher shelf.
The room that matters most is the bedroom. Half of all child tip-over deaths happen in the bedroom, per CPSC, the room where dressers and chests are the dominant climbable furniture. The living room comes second at 22%. Which means anchoring the bedroom dresser is the single highest-leverage action most parents can take, but it does not end there.
And the injury toll beyond fatalities is substantial. An average of 17,800 ED visits per year result from furniture and TV tip-overs, per the CPSC 2023 report. That’s a consistent, preventable stream of head injuries, crush injuries, and fractures in children who survived what others did not.
What the CPSC Recommends Anchoring
The CPSC recommends anchoring all furniture taller than 30 inches or heavier than 30 pounds. In practice, that covers almost every piece of furniture in a home with young children: dressers, chests, wardrobes, bookcases, entertainment centers, filing cabinets, nightstands on legs, and freestanding shelving units.
The 30-inch threshold surprises a lot of parents. That’s roughly counter height. A piece of furniture that comes up to your hip is tall enough to tip onto a toddler with serious consequences. Weight matters too, because even a lighter unit can generate enough force to injure a child when it falls.
Televisions deserve their own category. A flat-screen mounted on a stand rather than a wall is a tip-over risk even if it feels stable when you push on it. Children don’t push on TVs from the front. They grab the stand, pull a cable, or knock into the unit from the side. The physics change completely. A wall mount is the most reliable solution. If a wall mount is not possible, the TV stand itself needs to be anchored to the wall, and the TV needs to be secured to the stand.


How Anchors Work
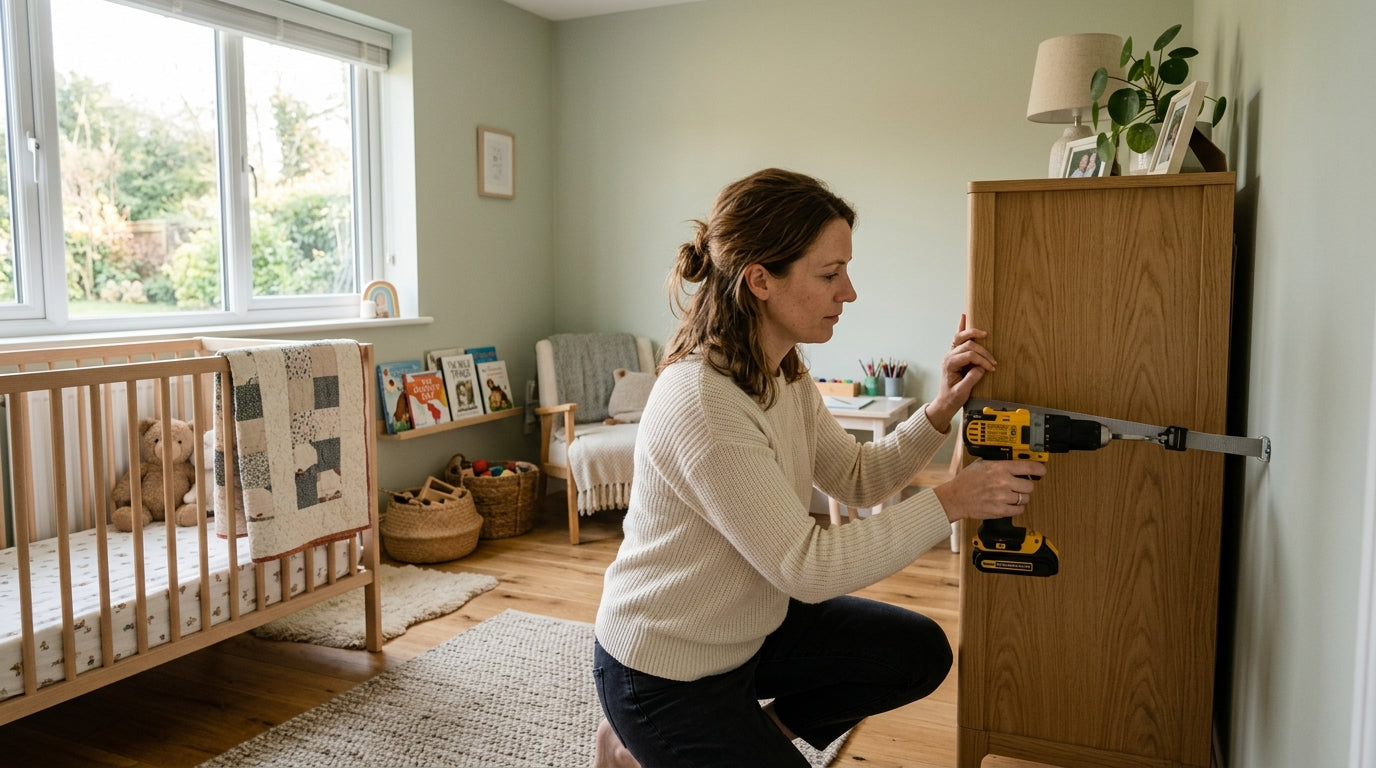
Wall anchors work by connecting the top of the furniture to the structural framing of the wall, distributing the force of a pull or a tip across the stud rather than relying on the furniture’s own weight as a counterbalance. A child pulling on open dresser drawers can generate significant downward and outward force. The furniture’s weight alone is not enough to resist that, especially on carpet, which reduces friction at the base.
Hardware-mounted straps, L-brackets, and furniture bolts are the reliable options. These connect with wood screws or lag bolts driven into wall studs, and when installed correctly, they hold. Adhesive-only anchors do not. Adhesive-based products, including command-strip style anchors marketed for furniture, are not appropriate as the sole anchoring method for any tall or heavy piece. They are designed for lightweight items. They fail over time, they fail on certain wall finishes, and they fail when furniture is moved even slightly. In my experience, an adhesive strap lock on a dresser failed at 26 months when a toddler climbed on it without realizing what she was doing. The adhesive had been on the wall for about eight months and it peeled cleanly away from the paint.
Hardware straps are inexpensive, widely available, and the installation takes about 20 minutes per piece of furniture. There is no reasonable trade-off that justifies using adhesive instead.
-
Locate the stud
Run a stud finder horizontally 2–4 inches below the furniture top. Mark both stud edges and find center. -
Confirm with a finish nail
Drive a small finish nail at your mark to verify solid wood before committing to the full fastener. -
Attach strap to furniture
Fasten the strap bracket to the furniture’s top rail or solid frame, not thin particleboard backing. -
Drive fastener into stud
Use a wood screw at least 2.5 inches long. Use a lag bolt with washer for heavy bookcases or entertainment centers. -
Check tension
Strap should be taut with about half an inch of slack. It prevents tipping, not all movement.
Finding Studs and Choosing the Right Fasteners
This is where most DIY anchoring projects go wrong. Driving a screw into drywall without hitting a stud will not hold. Drywall anchors, toggle bolts, and similar wall anchors are not designed for the dynamic load a climbing child generates. The only reliable anchor point is a wall stud.
Use a stud finder. Run it horizontally across the wall at the height where you’ll attach the strap or bracket, typically 2–4 inches below the top of the furniture. Mark the stud edges on both sides, then find the center. Standard stud spacing is 16 inches on center, though older homes sometimes run 24 inches. Confirm you’ve found a stud by driving a small finish nail at your mark before committing to the full fastener.
For most furniture straps, you’ll use a wood screw at least 2.5 inches long, driven into the stud through the strap’s hardware plate. For heavier pieces like large bookcases or entertainment centers, a lag bolt with a washer is more secure. The fastener into the furniture itself matters too. Drive into solid wood, not particleboard, when possible. If the furniture back is thin particleboard, attach the bracket to the furniture’s frame or top rail instead.
The strap should be taut but not so tight that it pulls the furniture away from the wall. A small amount of slack, about half an inch, is fine. What you’re preventing is the tip, not all movement.
Anchoring by Furniture Type
Different pieces require slightly different approaches, and getting this wrong means the anchor may not engage when it matters.
Dressers and chests are the highest priority. Attach the strap or L-bracket at the top back of the unit, as high as the furniture allows, and into a stud. If the dresser has a back panel, verify it’s solid enough to hold a fastener. Many inexpensive dressers have very thin backing. In that case, anchor into the top rail or the side panels near the top. Use two anchor points if the dresser is wider than 36 inches.
Bookcases tip differently than dressers because the load shifts when shelves are unevenly filled. A bookcase with heavy books on the top shelf and nothing on the bottom is significantly more tip-prone than one loaded evenly. Anchor at the top, and for bookcases taller than 60 inches, consider two straps spaced horizontally if the unit is wide. The anchor prevents the tip, but the loading still affects how much force the anchor needs to absorb.
Televisions on stands need the stand anchored to the wall, and the TV secured to the stand with an anti-tip strap or cable. Many TV stands have pre-drilled holes in the back panel for exactly this purpose. If yours does not, a furniture strap looped around the stand’s frame and attached to the wall works. The TV itself should also be strapped or bracketed to the stand so it can’t slide off during a partial tip.
Nightstands and small side tables on legs are often overlooked. They’re light enough that a child pulling up on them can tip them easily, and they’re at exactly the right height for a toddler using them to stand. If the nightstand is next to a bed, anchor it.
Freestanding shelving units in playrooms, laundry rooms, and garages need anchoring even when they’re not in a child’s primary space. Children follow adults everywhere, and a laundry room shelf loaded with detergent is a serious hazard.
Room-by-Room Anchoring Checklist
Rooms Beyond the Bedroom
Because half of child tip-over deaths happen in bedrooms, it’s easy to focus anchoring efforts there and consider the job done. It’s not done.
Living rooms contain entertainment centers, media consoles, and bookcases. Playrooms often have freestanding shelving loaded with bins and toys. Bathrooms sometimes have freestanding storage units or small cabinets. Kitchens can have freestanding islands, baker’s racks, and pantry shelving. Any of these can tip.
In my experience testing anchoring hardware, a walk-through of a home with fresh eyes revealed four pieces that had not been anchored: a freestanding pantry unit in the kitchen, a small bookcase in the bathroom, a cube storage unit in the playroom, and a filing cabinet in the home office. A toddler had already figured out how to open the filing cabinet drawers. The cabinet was light enough that two open drawers would have shifted its center of gravity past the tipping point.
Furniture arrangement also matters. Placing any climbable furniture near a bed, couch, or other raised surface gives children a launch point. Keep furniture at least 12 inches from windows, which prevents children from accessing window hardware and reduces the risk of a fall through a screen if a tip pushes them toward the glass.
Maintenance, Rentals, and Ongoing Checks
Anchors are not install-and-forget. Check every anchor point every 6–12 months. Straps can loosen as furniture settles. Screws can back out slightly over time, especially in homes with seasonal humidity changes that cause wood to expand and contract. Wall damage around the anchor point, from moisture, impact, or just age, can compromise holding power even if the hardware looks fine.
In rental properties, this is more complicated. Drilling into walls requires landlord permission in most leases, and some landlords refuse. If you cannot get permission or cannot drill, there are furniture anchor systems designed to attach to the furniture frame itself and brace against the floor rather than the wall. These are less reliable than wall-mounted hardware. They are better than nothing. Get the landlord’s permission in writing if possible, explain the child safety reason, and document the installation. Many landlords will agree when the request is framed correctly.
If you move, remove the anchors and reinstall them in the new space. Do not assume the furniture is safe during a move or during the period when rooms are being arranged. Tip-overs happen during transitions.
Recalls and Staying Current
The CPSC issues recalls on furniture with known tip-over risks on a regular basis. IKEA’s MALM dresser recall is the most widely known, but it is far from the only one. Register every piece of furniture you purchase with the manufacturer so you receive recall notifications directly. Check the CPSC recall database at cpsc.gov when you bring secondhand furniture into your home, especially dressers and bookcases.
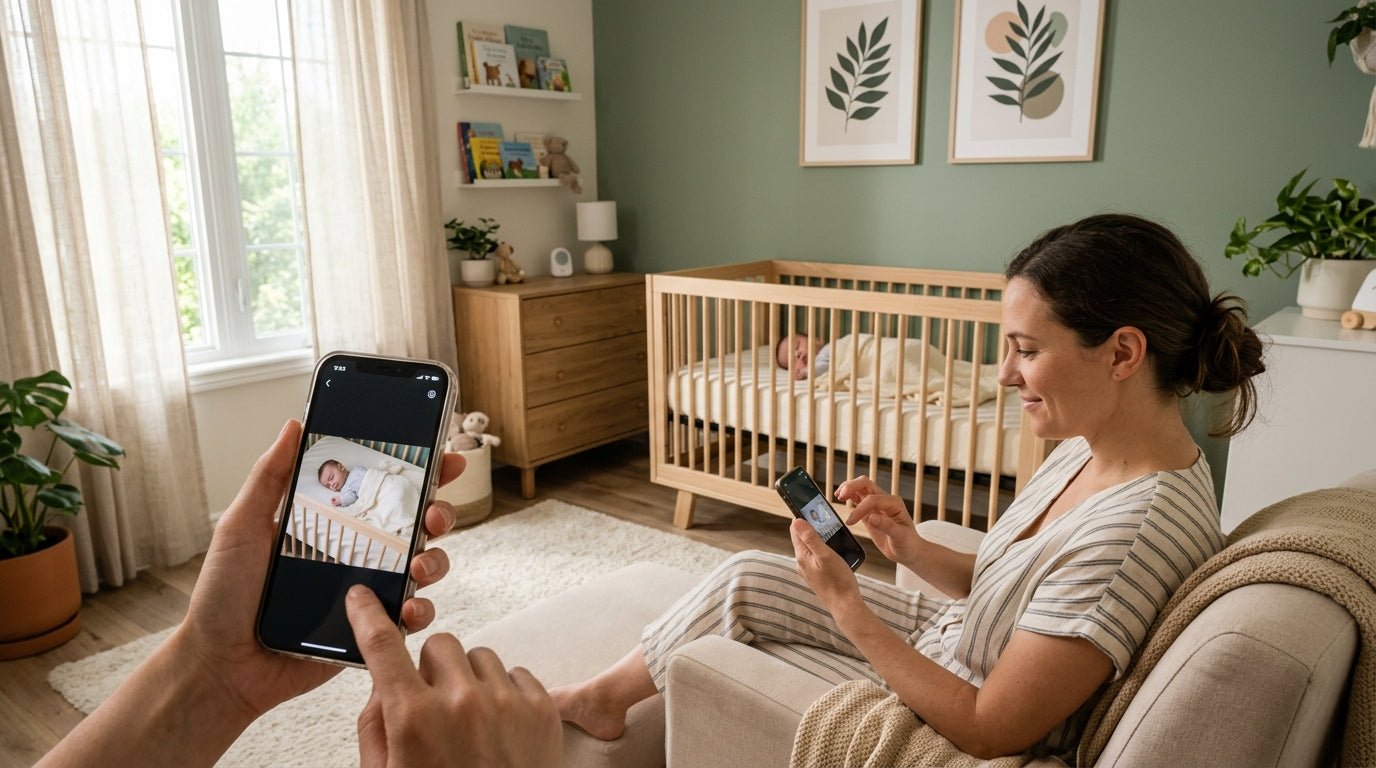
The CPSC’s Anchor It! campaign has resources including installation guides and a room-by-room checklist available at anchorit.gov. These are worth bookmarking.
Teaching Children, and What Anchors Cannot Do
Anchors prevent tip-overs. They do not prevent children from climbing furniture, pulling items off shelves, or injuring themselves in other ways. Supervision remains essential, and age-appropriate conversations about furniture safety are worth having even with toddlers.
My older daughter understood "the dresser can fall and hurt you" at about two and a half. She didn’t fully believe it, because toddlers don’t fully believe anything they haven’t experienced. But the conversation was still worth having, and it got more traction as she got older. Pair the physical hardware with consistent reinforcement that furniture is not a climbing structure.
The Installation Order That Makes Sense
If you’re starting from scratch or doing a whole-house audit, work in this order: bedroom first, then living room, then playroom, then everywhere else. Within each room, prioritize by height and by proximity to where your child sleeps or plays most.
You need a stud finder, a drill, the appropriate screws or lag bolts for your wall and furniture type, and the anchor hardware itself. Budget about 20 minutes per piece once you’ve done the first one. The first one takes longer because you’re learning the process. By the third dresser, it’s routine.
The CPSC’s 30-inch and 30-pound thresholds are a useful floor, not a ceiling. If something is climbable and not anchored, anchor it. The cost of the hardware is a few dollars per piece. The installation time is under half an hour. There is no version of that trade-off that doesn’t favor anchoring.